
You need a map for a paper or a presentation? This QGIS tutorial shows you how to create a layout for your map with a title, a legend, a north arrow, a scale etc., which you can export as image or PDF.
Hint: Scroll to the end of the page to find a special version of the tutorial which shows you how to place two maps with the same extent and scale side by side.
For better understanding, QGIS commands are marked in bold italics.
You should have a map from a QGIS project that you want to put into a layout.
1. New Print layout
Before we start with the layout, we select the layers we want to show by ticking them in the layers window. The scale of the map will be adopted by the layout. So, if you want your map big, then zoom in now. If you want it small, zoom out. You can adjust the scale later on in the layout.
Now click on Project –> New Print Layout … and give the layout a name. The layout will be saved into the QGIS project. A new window with a white sheet opens.
2. Adding elements to the map layout
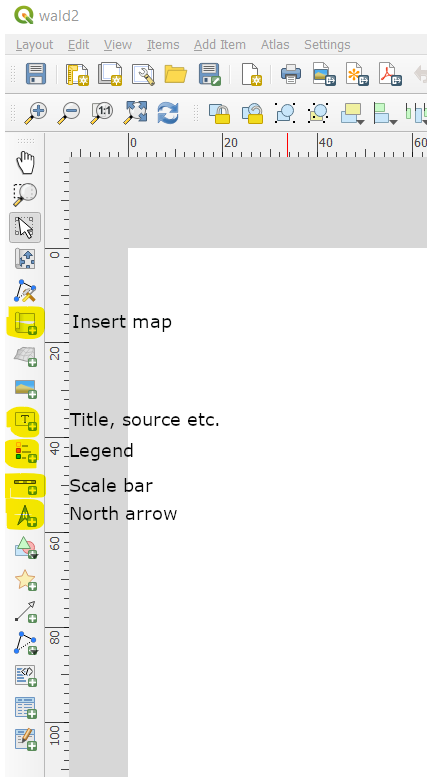
We can now click on the elements on the left (marked in yellow), which we want on the map, and draw them in the correct size on the white sheet e.g., the map itself, the title, the legend, the scale bar, a north arrow, the source etc. We can move the elements around to adjust their position.
All the elements that are placed on the map layout appear in the tab Items. The order matters: The element at the bottom is also displayed as bottom layer in the map.
If the map is too small or too big for the extent of the white sheet, you can adapt its scale by clicking on Item Properties, then Scale (in the Main Properties).
All the elements can be formatted extensively in the Item Properties. The element that needs the most formatting is the legend as all the layers that were in the project are displayed now in the map layout. Additionally, we might want to change the working names of the layers into nicely written names.
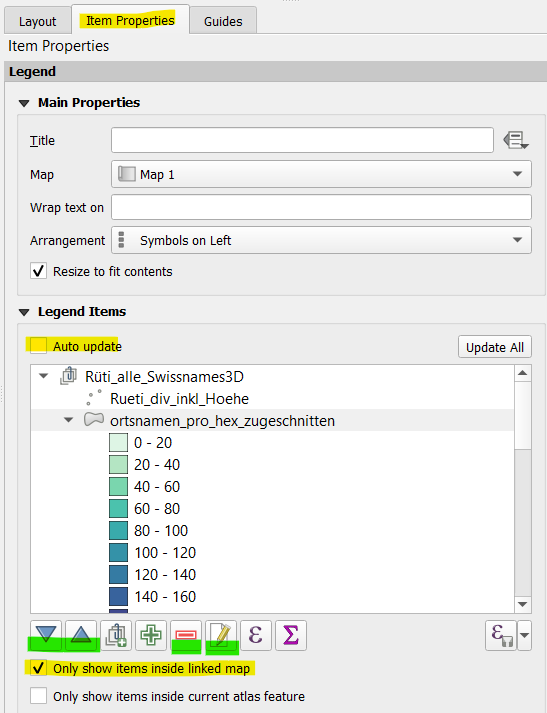
Formatting the legend
In the Item Properties of the Legend, we can set a Title e.g., “Legend”. Under Legend Items, we deselect the Auto update (remove the tick). We select layers we do not want and remove them with the red minus icon (–) below the legend items. With the arrows, we can choose the order of the remaining items. To change the name, we select the corresponding layer and click on the icon with the white sheet and the yellow pen. You can edit the text and with the back arrow return to the item properties.
3. Export your map
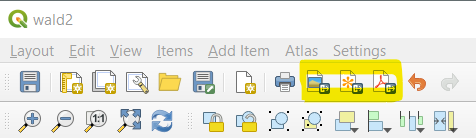
As soon as you are happy with your layout, you can export it as image or PDF by clicking on one of the yellow highlighted icons in the screenshot on the right side. Define where you want to save your file and then determine the resolution and size of the file.